Introduction and Quick Summary
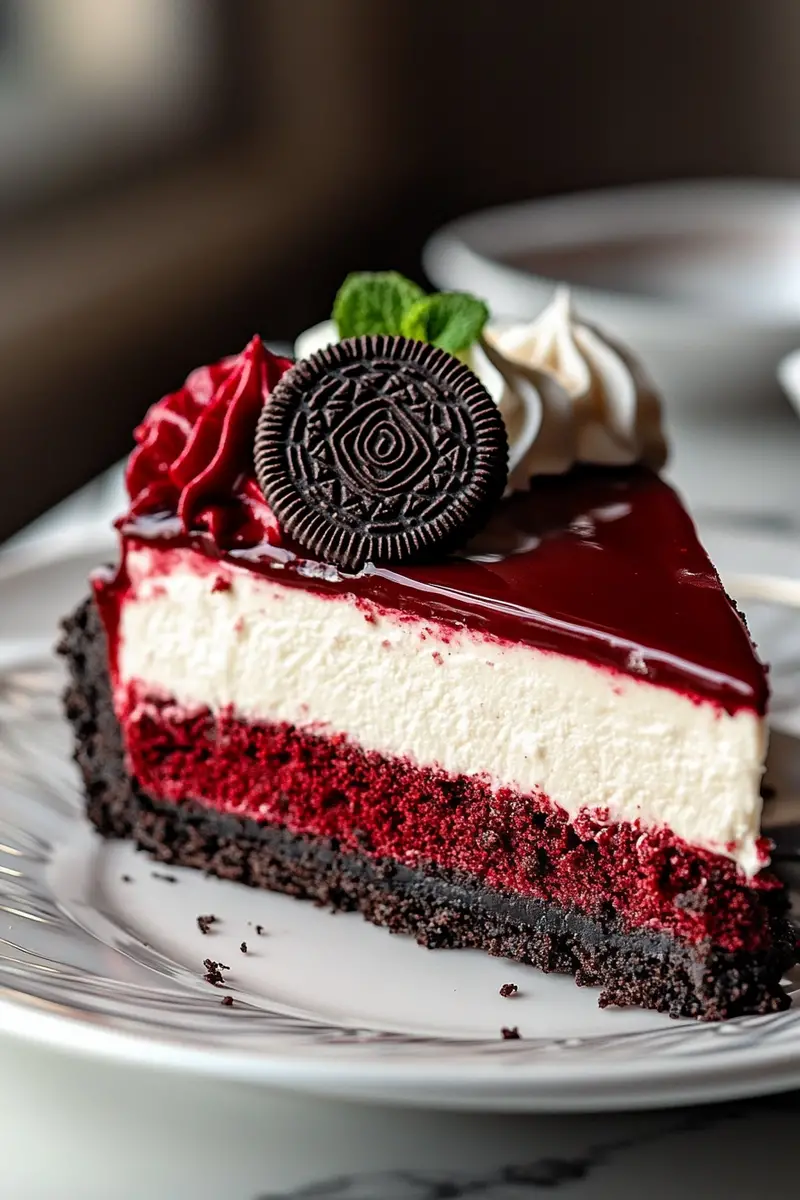
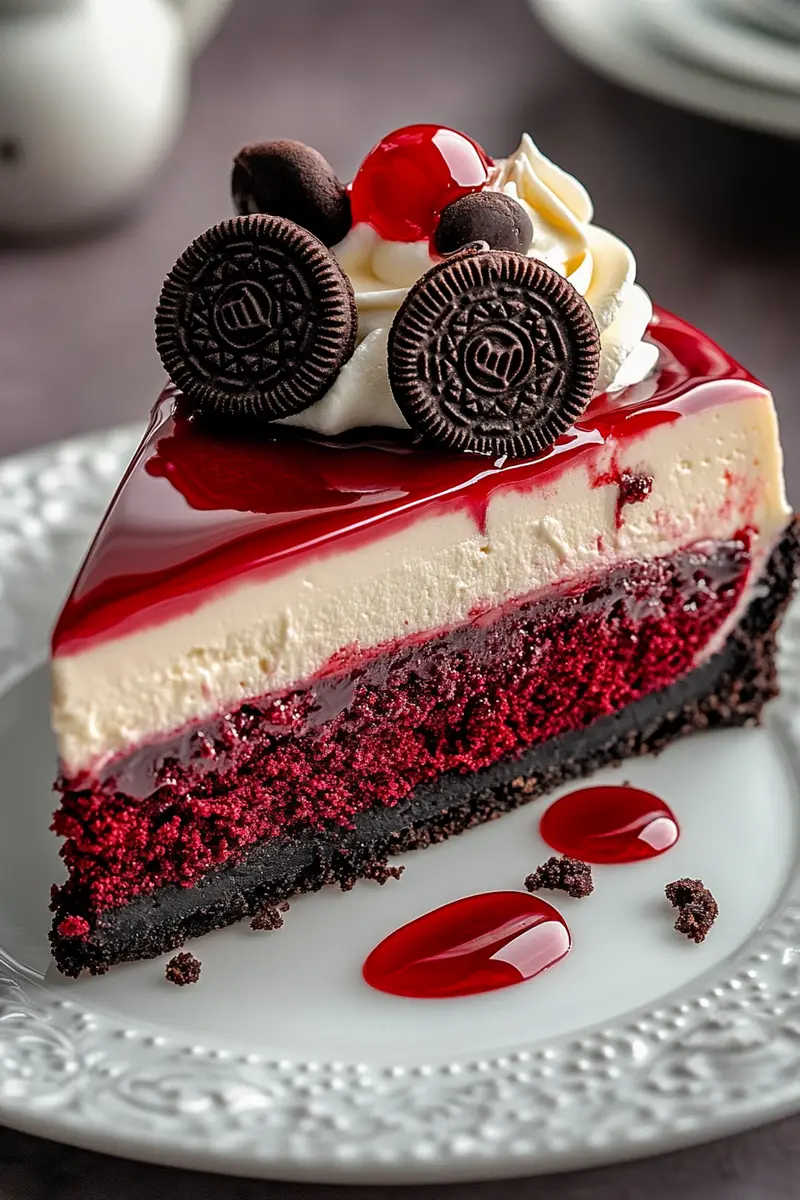
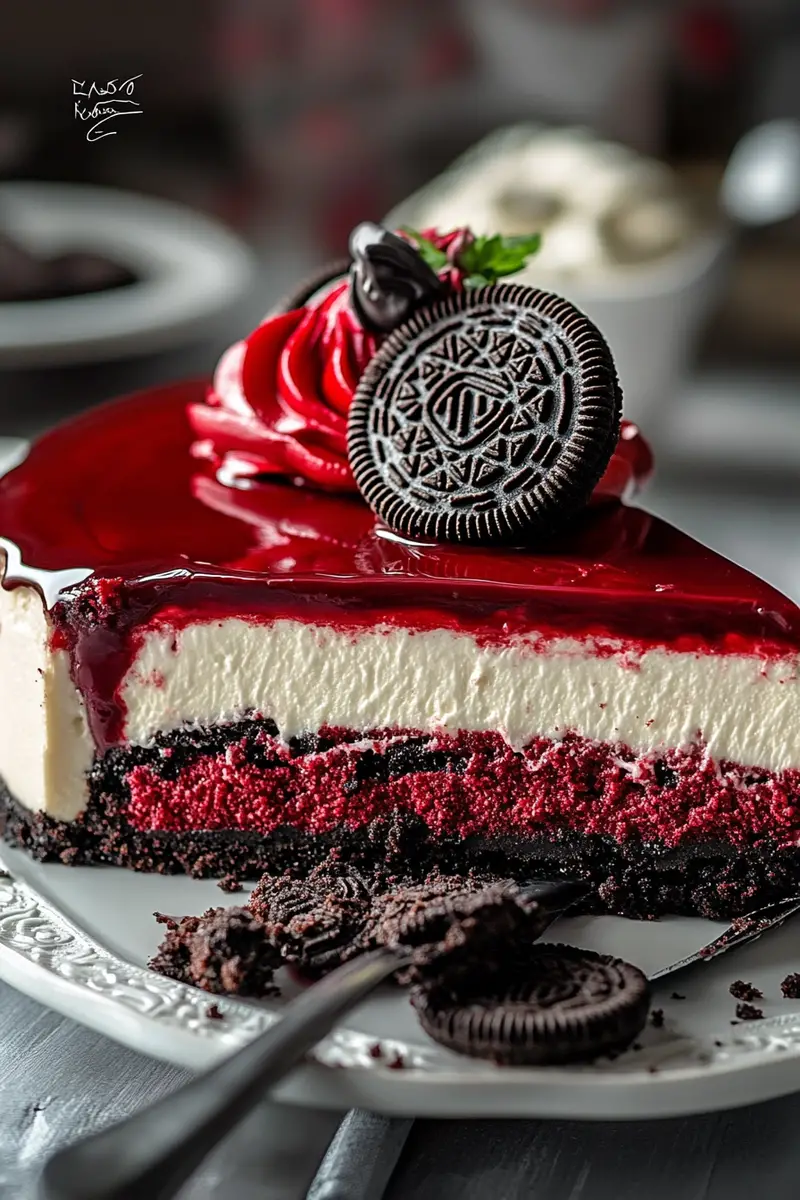
If you’re in search of a dessert that combines the rich flavors of red velvet cake and creamy cheesecake with a delightful twist, look no further than this Red Velvet Oreo Cheesecake. This show-stopping dessert is perfect for any occasion, from birthdays to holiday gatherings. With its vibrant color and luscious layers, it appeals not only to the taste buds but also to the eyes.

The combination of velvety red sponge cake and the tangy sweetness of cream cheese creates a harmonious balance that will leave your guests wanting more. Moreover, the added crunch of Oreo cookies in the crust elevates this cheesecake to another level of deliciousness. Each bite delivers a burst of flavor that is simply irresistible.
In this article, we will guide you through the main ingredients required to create this delectable treat and provide detailed step-by-step instructions on how to prepare it. Lastly, you’ll find serving suggestions and storage tips to help you enjoy your cheesecake at its best. Get ready to impress everyone with your baking skills as we dive into the world of Red Velvet Oreo Cheesecake!

Main Ingredients
Cream Cheese
Cream cheese is a fundamental element in any cheesecake recipe. For our Red Velvet Oreo Cheesecake, you’ll need 16 ounces (two packages) of softened cream cheese. This ingredient provides the creamy texture and tangy flavor that complements the sweetness of the red velvet cake beautifully. Make sure your cream cheese is at room temperature before mixing; this ensures a smooth batter without lumps.
Granulated Sugar
You will need one cup (200 grams) of granulated sugar for this recipe. Sugar not only sweetens the cheesecake but also helps achieve that decadent texture we all crave in a good dessert. Its role is vital in balancing out the savory notes from both the cream cheese and the cocoa powder used in this recipe.
Eggs
For binding and structure, use three large eggs at room temperature. Eggs play an essential role in providing moisture and stability to your cheesecake filling. They help create that rich custard-like consistency that makes every bite melt in your mouth.
All-Purpose Flour
To thicken the filling slightly while maintaining its creamy texture, you’ll need two tablespoons (about 15 grams) of all-purpose flour. This ingredient helps stabilize your cheesecake during baking without making it dense or heavy.
Cocoa Powder
For a true red velvet experience, include two tablespoons (about 15 grams) of unsweetened cocoa powder in your batter. It adds depth and richness to the flavor profile while enhancing that signature reddish hue associated with red velvet desserts.
Oreos
A crucial component for both crust and decoration is 20 regular Oreos crushed into fine crumbs—this gives your cheesecake a delightful cookie flavor and texture contrast! You can use additional Oreos for garnishing on top once your cheesecake has cooled.
Unsalted Butter
You’ll require 5 tablespoons (about 70 grams) of melted unsalted butter for binding together the crushed Oreos in the crust layer. This adds richness while ensuring that your crust holds its shape when baked.
Heavy Cream
Lastly, use one cup (240 ml) of heavy cream for whipping and topping your cheesecake once it’s ready to serve. Whipping cream adds an airy lightness that balances out the dense nature of cheesecake wonderfully.
How to Prepare Red Velvet Oreo Cheesecake
Prepare The Crust
Start by preheating your oven to 325°F (160°C). While it heats up, take a medium bowl and combine 20 crushed Oreos with 5 tablespoons of melted unsalted butter until evenly mixed. Press this mixture firmly into the bottom of a greased springform pan using a measuring cup or flat-bottomed glass for even distribution. Ensure you cover all areas well; this creates a sturdy base for your cheesecake.
Place the pan in your preheated oven for about 10 minutes until set but not browned—this step enhances flavor while providing structure to support heavier layers above it! Once baked, remove from oven and allow it to cool while you prepare the filling.
Make The Filling
In another large mixing bowl, beat together two packages (16 ounces) of softened cream cheese with one cup (200 grams) granulated sugar using an electric mixer on medium speed until smooth—around 2 minutes should suffice! Scrape down sides as needed before adding three eggs one at a time; beat well after each addition ensuring everything is combined thoroughly.
Next, sift two tablespoons (15 grams) of cocoa powder alongside two tablespoons (15 grams) all-purpose flour into this mixture before continuing to mix on low speed until fully incorporated—avoid overmixing here as doing so may lead to cracks during baking! Pour half this mixture over cooled crust then sprinkle remaining crushed Oreos evenly across before topping with remaining batter gently spreading it out across surface area ensuring even coverage throughout.
Bake The Cheesecake
Once prepped properly place springform pan into preheated oven again allowing bake for approximately one hour or until edges appear set while center remains slightly jiggly—this ensures perfect texture when chilled! After baking time completes turn off heat leaving oven door ajar letting cake cool gradually inside without rapid temperature changes which could cause cracking later on during chilling process!
After about an hour remove from oven carefully wrapping foil around bottom edge if necessary preventing water seeping during cooling phase! Allow cooling completely at room temperature before transferring chilled into refrigerator allowing at least four hours or ideally overnight letting flavors meld beautifully together creating unforgettable taste experience!
Serving and Storing Tips
Serve Chilled
When it comes time to serve your Red Velvet Oreo Cheesecake cut slices directly from springform pan using sharp knife dipped lightly into warm water making clean cuts each time! For added flair consider garnishing tops with whipped cream dollops alongside crushed Oreos creating visually stunning presentation sure impress guests upon arrival!
Serve chilled on beautiful serving platter or individual dessert plates garnished exactly how desired showcasing vibrant colors textures present within cake itself! Pair alongside fresh berries such strawberries raspberries enhancing sweetness balance against richer flavors found within decadent layers below!
Store Properly
To store leftovers correctly ensure they are adequately covered either using plastic wrap or aluminum foil preventing unwanted air exposure leading dryness over time! Place stored slices back inside refrigerator where they can last up until five days maintaining freshness throughout entire period!
For longer storage options consider freezing individual slices wrapped tightly into plastic wrap followed by placing inside airtight container—this allows enjoying later on without sacrificing quality preservation! When ready thaw overnight within fridge before indulging once again reliving delightful experiences created previously through careful preparation processes established earlier within article shared above!
Mistakes to avoid
One common mistake when preparing Red Velvet Oreo Cheesecake is not measuring ingredients accurately. Precision is crucial in baking, as even a slight variation can affect the texture and flavor of your cheesecake. Always use a kitchen scale or measuring cups and spoons for dry and liquid ingredients. For example, when measuring flour, spoon it into the cup and level it off with a knife instead of scooping directly from the bag. This ensures you don’t pack it down, which can lead to a dense cheesecake.
Another pitfall is overmixing the batter. While mixing is essential for combining ingredients, overdoing it can incorporate too much air and cause cracks in your cheesecake as it bakes. Mix until just combined, ensuring that all ingredients are incorporated without excessive stirring. This approach will result in a smooth and creamy texture that elevates the overall taste of your Red Velvet Oreo Cheesecake.
Using low-quality or expired ingredients also hinders your cheesecake’s potential. Always opt for fresh cream cheese, high-quality cocoa powder, and real vanilla extract for the best flavor. Check the expiration dates on all dairy products to ensure they are fresh. Substituting with lower-quality ingredients might save you some money but could lead to disappointing results.
Failing to let your cheesecake cool properly is yet another mistake to avoid. After baking, allow your Red Velvet Oreo Cheesecake to cool gradually in the oven with the door ajar for at least an hour before transferring it to the refrigerator. This process helps prevent cracking and allows flavors to meld beautifully.
Lastly, always chill your cheesecake adequately before serving. Ideally, let it sit in the fridge for at least four hours or overnight for the best texture and flavor development. Rushing this step might result in a runny consistency that detracts from your dessert experience.

Tips and tricks
To create a flawless Red Velvet Oreo Cheesecake, begin by preparing your crust correctly. Use finely crushed Oreo cookies mixed with melted butter as the base. Press this mixture firmly into the bottom of your springform pan to create a solid foundation. The key here is ensuring an even layer; this will enhance both flavor and texture while allowing for easy slicing once it’s set.
Next, consider using room temperature cream cheese for an ultra-smooth filling. Cold cream cheese can lead to lumps that are hard to remove during mixing. Take your cream cheese out of the refrigerator about 30 minutes before you start preparing your cheesecake batter. This simple tip results in a creamy consistency that blends seamlessly with other ingredients.
Incorporating color into your Red Velvet Oreo Cheesecake enhances its visual appeal. Use gel food coloring rather than liquid coloring for better results; gel colors provide vibrant hues without altering the batter’s consistency significantly. Just a few drops will give your cheesecake that iconic red hue without compromising its texture.
When baking, use a water bath (bain-marie) technique to create a humid environment within the oven. Wrap aluminum foil around the bottom of your springform pan to prevent leaks and place it in a larger pan filled with hot water while baking. This method helps regulate temperature, preventing cracking and ensuring even cooking throughout.
Lastly, don’t skip garnishing! Top off your chilled Red Velvet Oreo Cheesecake with whipped cream or additional crushed Oreos for an impressive presentation. Fresh berries can also add color and contrast while complementing flavors beautifully—making every slice as delightful visually as it is taste-wise.
Suggestions for Red Velvet Oreo Cheesecake
When making Red Velvet Oreo Cheesecake, consider infusing flavors into each component for maximum impact. For instance, add espresso powder or coffee granules to the batter; this enhances chocolate notes without overpowering them—creating depth in flavor while still keeping true to its signature profile.
Experimenting with different types of Oreos can yield exciting variations! Try using mint-flavored Oreos or peanut butter Oreos instead of classic ones in either crust or topping layers—these swaps introduce new taste sensations that keep things interesting while remaining within the realm of familiar flavors.
If you’re looking for healthier alternatives without sacrificing taste, consider substituting Greek yogurt for some cream cheese in your filling recipe; this not only reduces calories but also adds protein! The tanginess complements sweet elements perfectly while maintaining texture—an ideal compromise between health-conscious choices and indulgence.
Pairing desserts with sauces elevates their appeal significantly—drizzle homemade chocolate ganache or raspberry sauce over slices just before serving adds another layer of deliciousness! These additions provide contrasting flavors and textures while making each bite feel extra special—ideal when hosting gatherings!
Finally, if you’re short on time but still want impressive results, consider using pre-made crusts available at grocery stores! They save effort without sacrificing quality too much compared against homemade versions—allowing more focus on perfecting filling recipes instead!
FAQs
What makes Red Velvet Oreo Cheesecake unique?
Red Velvet Oreo Cheesecake stands out due to its rich combination of flavors and textures derived from traditional red velvet cake mixed with creamy cheesecake elements paired together beautifully within an Oreo cookie crust—a nod towards two beloved desserts that unite harmoniously!
Can I make Red Velvet Oreo Cheesecake ahead of time?
Yes! Preparing this delicious dessert ahead allows ample time for chilling overnight after baking—enhancing flavor development while simplifying day-of serving logistics; making it ideal when planning parties or gatherings where stress levels may run higher than usual!
How long should I bake my Red Velvet Oreo Cheesecake?
Typically, it requires around 55-65 minutes at 325°F (160°C) until edges appear set while center remains slightly jiggly—it will firm up as it cools! Keeping an eye on timing ensures optimal outcomes without risking overcooking which could lead undesirable dryness!
What type of cream cheese should I use?
Opting for full-fat cream cheese yields best results since lower-fat options often lack richness needed within cheesecakes—resulting instead bland flavors lacking creamiest mouthfeel possible! Stick brands known quality like Philadelphia® guarantee satisfying outcomes consistently every time!
How do I store leftovers properly?
Store any leftover slices wrapped tightly within plastic wrap placed inside airtight containers stored within refrigerator up-to five days maximum freshness maintained easily whilst preserving textures intact longer-term enjoyment across days following initial preparation!
Can I freeze my Red Velvet Oreo Cheesecake?
Absolutely! Freezing slices individually wrapped well helps preserve freshness beyond five days; simply thaw overnight in refrigerator prior indulgence next day—the key lies ensuring airtight seals maintained throughout freezing period preventing freezer burn ruining delightful flavors originally intended!
Conclusion
Creating a stunning Red Velvet Oreo Cheesecake is easier than you think when you pay attention to detail throughout each step! By avoiding common mistakes such as inaccurate measurements or neglecting ingredient quality—and employing effective tips like using room temperature cream cheese—you’ll achieve impressive results every time! Experimentation through different variations keeps things fresh while garnishing elevates presentation truly transforms dessert experiences enjoyed by friends family alike!
With careful preparation methods coupled alongside smart suggestions tailored specifically towards enhancing flavors textures alike—you’ll soon find yourself mastering not just one delicious treat alone—but an entire repertoire showcasing versatility creativity within kitchen endeavors where culinary passions flourish endlessly beyond confines expected norms traditionally associated desserts!
PrintDecadent Red Velvet Oreo Cheesecake Recipe
- Total Time: 1 hour 20 minutes
- Yield: 10 servings 1x
Description
A decadent, creamy cheesecake with layers of red velvet and Oreo flavors—perfect for special occasions or indulgent moments.
Ingredients
For the Crust
- 24 Oreo cookies, crushed
- 4 tbsp unsalted butter, melted
For the Cheesecake Filling
- 16 oz cream cheese, softened
- 1 cup granulated sugar
- 3 large eggs
- 1 tsp vanilla extract
- 1/4 cup cocoa powder
- 1/4 cup red food coloring
For the Topping
- 8 Oreo cookies, crushed (optional)
- Whipped cream (optional)
Instructions
- Prepare the Crust:
- Mix crushed Oreos with melted butter until combined.
- Press the mixture firmly into the bottom of a springform pan. Chill for 15 minutes.
- Make the Filling:
- Beat cream cheese and sugar until smooth. Add eggs one at a time, mixing well after each.
- Stir in vanilla, cocoa powder, and red food coloring until fully combined.
- Assemble and Bake:
- Pour the filling over the chilled crust.
- Bake at 325°F (160°C) for 55-60 minutes or until the center is slightly jiggly.
- Cool to room temperature, then chill in the refrigerator for at least 4 hours or overnight.
- Add Toppings (Optional):
- Garnish with crushed Oreos and whipped cream before serving.
Notes
- For best results, use gel food coloring for vibrant color.
- Ensure all ingredients are at room temperature to avoid lumps.
- Store leftovers in the fridge for up to 3 days.
- Prep Time: 20 minutes
- Cook Time: 60 minutes
Nutrition
- Calories: 420
- Sugar: 28g
- Fat: 25g
- Carbohydrates: 45g
- Fiber: 2g
- Protein: 7g