Introduction and Quick Summary
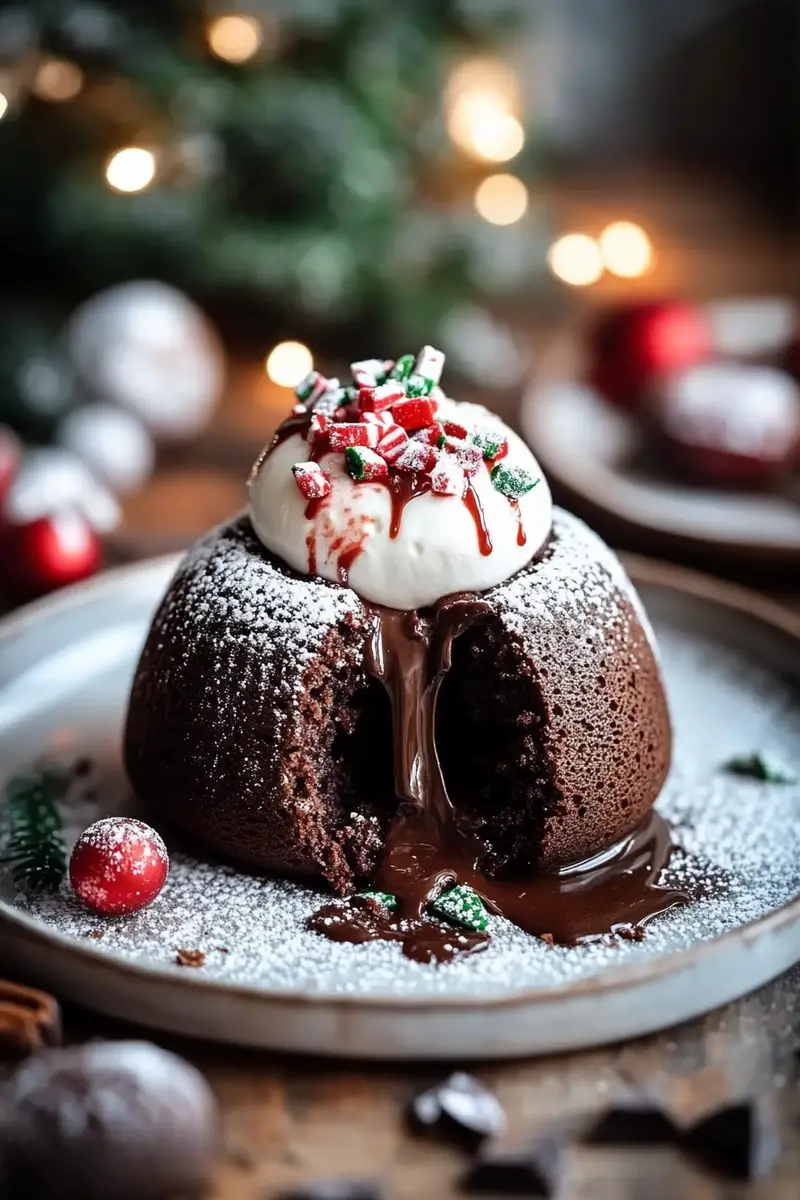
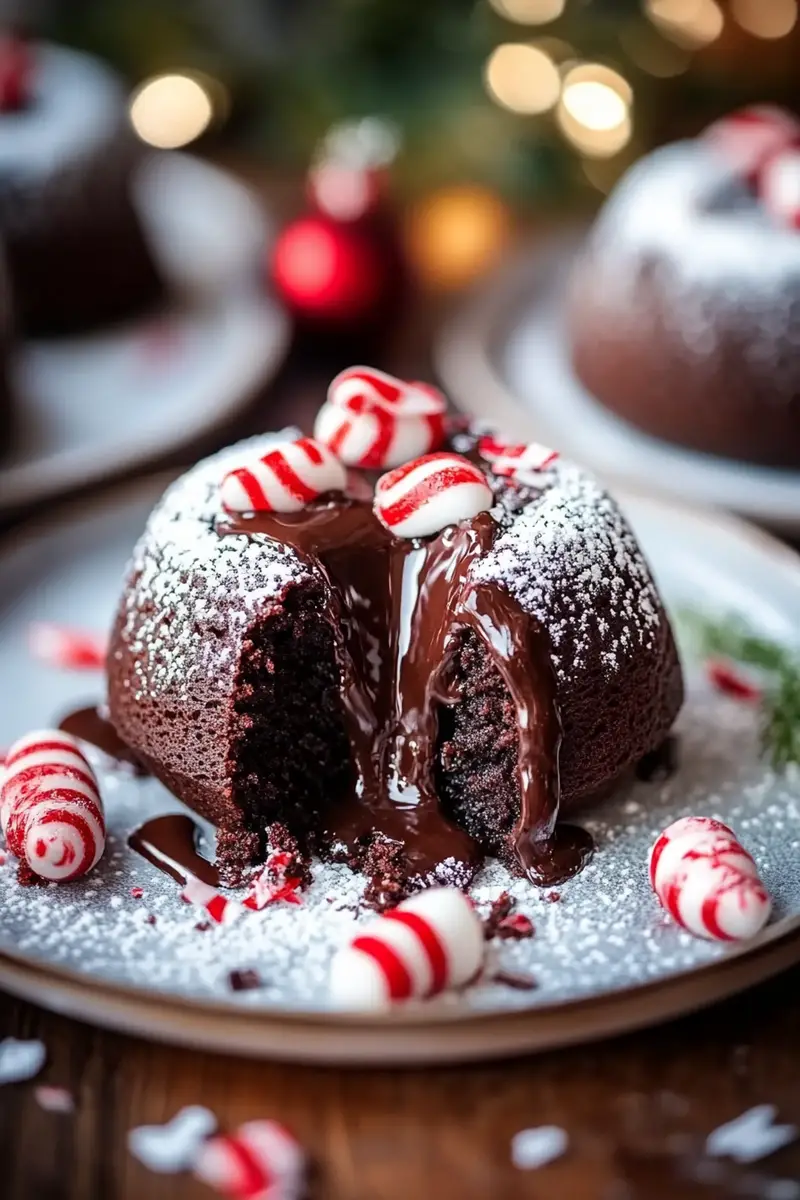
The holidays are a time for celebration and indulgence, and what better way to treat yourself and your loved ones than with a batch of Festive Chocolate Lava Cakes with Peppermint Bliss? These delightful treats are not only visually stunning but also offer an explosion of flavor that will leave everyone craving more. Picture this: a warm, gooey center filled with rich chocolate and a hint of peppermint that flows out as soon as you cut into the cake. The combination is simply irresistible!
This recipe combines the classic allure of molten chocolate cake with festive peppermint flavors that evoke the warmth and joy of the season. Whether you are hosting a holiday party or simply treating yourself after a long day, these lava cakes will elevate any occasion. They are easy to prepare yet impressive enough to wow your guests. With just a few simple ingredients and straightforward instructions, you will create restaurant-quality desserts right in your kitchen.
Get ready to embark on a culinary adventure as we guide you through the steps of making these luscious lava cakes. From gathering the main ingredients to serving them in style, this article covers everything you need to know about creating the perfect sweet ending to your holiday meals. So roll up your sleeves and let’s dive into this mouthwatering recipe!
Main Ingredients
High-Quality Dark Chocolate
To achieve that rich, deep flavor characteristic of chocolate lava cakes, start with high-quality dark chocolate. Aim for chocolate that contains at least 70% cocoa solids for an intense taste experience. About 6 ounces should suffice for this recipe. Melted dark chocolate provides the foundation for the gooey center while enhancing the overall richness of each bite.
Unsalted Butter
Unsalted butter is essential for this recipe as it allows you to control the salt content in your dish. You’ll need approximately half a cup (one stick) of unsalted butter. The butter adds moisture and helps create that melt-in-your-mouth texture that makes these cakes so irresistible.
Granulated Sugar
Sugar sweetens our lava cakes perfectly while balancing out the bitterness from dark chocolate. You will require around half a cup of granulated sugar to enhance flavor and provide structure to your cake batter.
Eggs
Eggs play a crucial role in binding all ingredients together while adding richness to our batter. For this recipe, use two large eggs along with two egg yolks to ensure we get that desired molten effect inside each cake.
All-Purpose Flour
All-purpose flour is necessary for giving structure to our cakes while keeping them light and airy. You will need about 1/4 cup of all-purpose flour—this small amount ensures that our lava cakes are soft without being dense.
Peppermint Extract
For that festive touch, you can’t forget about peppermint extract! Just one teaspoon will add an aromatic flavor reminiscent of winter holidays without being overpowering.
Powdered Sugar (for dusting)
A light dusting of powdered sugar adds a charming finishing touch, making these desserts look elegant when served. Simply sprinkle over each cake right before serving for an extra visual appeal.

How to Prepare Festive Chocolate Lava Cakes with Peppermint Bliss Recipe
Step 1: Preheat Your Oven
Start by preheating your oven to 425°F (220°C). This temperature is critical as it allows the outer layer of the cake to set quickly while keeping the inside gooey and molten. Preparing your ramekins beforehand is also key; grease four ramekins lightly with butter or cooking spray and place them on a baking tray for easier handling later on.
Step 2: Melt Chocolate and Butter Together
In a microwave-safe bowl or using a double boiler setup on the stove, combine 6 ounces of high-quality dark chocolate chunks or chips with half a cup (one stick) of unsalted butter. Heat gently until both components have melted completely—stirring occasionally ensures they blend smoothly without burning. Once melted into a glossy mixture, set it aside to cool slightly while you prepare other ingredients.
Step 3: Whisk Eggs and Sugar
In another bowl, beat together two large eggs along with two egg yolks using either an electric mixer or whisk until it becomes frothy—this should take about two minutes at medium speed if using an electric mixer. Gradually add half a cup of granulated sugar while continuing to whisk until fully combined; aim for pale yellow color development which indicates air incorporation into your mixture.
Step 4: Combine Wet Ingredients
Now it’s time to combine our melted chocolate mixture with egg-sugar blend carefully! Pour cooled melted chocolate into egg-sugar mix slowly while stirring constantly; this prevents eggs from scrambling due to heat exposure from hot chocolate. Once fully incorporated add one teaspoon of peppermint extract ensuring even distribution throughout batter.
Step 5: Fold in Dry Ingredients
Gently fold in 1/4 cup all-purpose flour using spatula movements rather than vigorous mixing; we want our batter light yet consistent without developing gluten which could lead us toward dense outcomes instead! The result should be silky smooth batter free from lumps—set aside momentarily as we move onto next steps!
Step 6: Fill Ramekins
Using either scoop or ladle method fill prepared ramekins evenly up until about three-quarters full leaving enough space for them to rise during baking process! This allows room for that signature molten center once baked correctly! Place filled ramekins onto preheated baking tray then slide into oven carefully avoiding spills!
Step 7: Bake Lava Cakes
Bake these delicious creations at preheated temperature (425°F/220°C) for precisely twelve minutes; keep close eye during last few minutes as ovens vary slightly! The edges should appear firm while tops remain soft—don’t overbake otherwise risk losing their coveted gooey interior!
Step 8: Serve Immediately
Once baked allow cakes cooling just briefly before running knife around edges carefully releasing them from ramekins onto individual plates upside down! Dust tops lightly with powdered sugar before serving alongside whipped cream or vanilla ice cream if desired—a delightful contrast against warm chocolaty goodness awaits!

Serving and Storing Tips
Serving Suggestions
These Festive Chocolate Lava Cakes shine brightest when served immediately after baking—they maintain their gooey centers best at this point! Pairing them alongside fresh whipped cream adds richness while balancing sweetness perfectly; alternatively consider pairing with vanilla ice cream which melts beautifully against warm cake creating heavenly contrasts! Garnish plates further by drizzling melted dark chocolate sauce over top or sprinkling crushed candy canes adding festive flair visually appealing delights sure delight guests!
Storing Leftover Lava Cakes
If by chance there are leftovers (though unlikely!), storing becomes necessary—allow cooled cakes cool fully then cover tightly using plastic wrap or transfer into airtight container refrigerate up until three days maximum without compromising texture too much; when ready enjoy return them back oven heating briefly (around five minutes at lower temp) reactivating molten centers before diving back into deliciousness again!
Reheating Instructions
To reheat leftover lava cakes effectively ensure they stay moist during process—place them within microwave-safe dish covering lightly damp paper towel helping trap steam throughout reheating cycle ensuring no dryness occurs preventing loss lusciousness experienced initially upon first bake! Microwave on low power setting increments until warmed through noting careful timing prevents overdoing ruining delicate balance achieved originally!
Enjoy making these decadent Festive Chocolate Lava Cakes with Peppermint Bliss Recipe this holiday season—you won’t regret indulging yourself nor sharing joys found within every bite!
Mistakes to avoid:
When baking Festive Chocolate Lava Cakes with Peppermint Bliss, several common mistakes can lead to less-than-perfect results. One key mistake is overmixing the batter. When you mix too much, the cakes can become tough instead of soft and gooey. To prevent this, gently fold the ingredients until just combined. This ensures that your cakes maintain a light texture and achieve that molten center.
Another mistake is not properly greasing the ramekins. If you skip this step or don’t do it thoroughly, your lava cakes may stick to the sides, preventing them from releasing smoothly after baking. Use butter or cooking spray generously on the inside of each ramekin and dust with cocoa powder for added assurance.
Additionally, many bakers underestimate the importance of using high-quality chocolate. Cheap chocolate can affect both the flavor and texture of your lava cakes. Opt for a good quality dark chocolate with at least 60% cocoa content for the best results. This will enhance the richness of your dessert and contribute to a more decadent experience.
Lastly, be cautious about baking time. Each oven is different; therefore, keeping a close eye on your cakes as they bake is essential. Overbaking will result in a cake that lacks that desirable molten center. Start checking your lava cakes a minute or two before the recommended time to ensure they come out perfectly.
Tips and tricks:
To make sure your Festive Chocolate Lava Cakes with Peppermint Bliss turn out perfectly, consider these helpful tips and tricks. First, prepare all your ingredients ahead of time. This not only saves time but also ensures you have everything you need on hand when you start mixing. Measure out your ingredients accurately for consistent results every time you bake.
Another useful tip is to let your batter rest before baking. Allowing it to sit for about 30 minutes lets flavors meld together and improves the texture of your lava cakes. While resting, preheat your oven so that it reaches the perfect temperature when you’re ready to bake.
Using room temperature eggs can significantly improve the final outcome of your desserts. Cold eggs can cause the batter to cool down too much, inhibiting proper rising during baking. To bring eggs to room temperature quickly, place them in warm water for about five minutes.
Additionally, consider adding a hint of espresso powder to enhance the chocolate flavor in your lava cakes subtly. This small addition amplifies richness without making them taste like coffee.
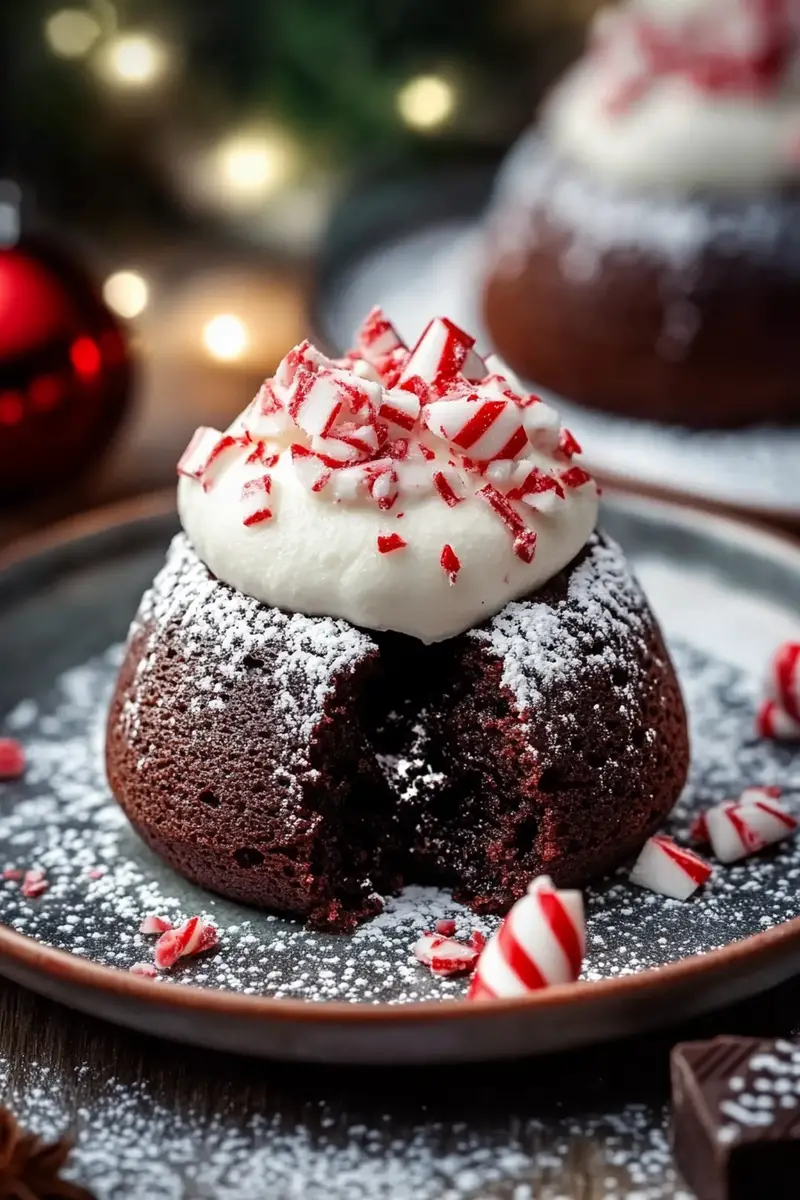
Finally, serve these delightful desserts immediately after baking for maximum enjoyment. The gooey center is best experienced fresh from the oven. You may also garnish with whipped cream or crushed peppermint candies right before serving for an extra festive touch.
Suggestions for Festive Chocolate Lava Cakes with Peppermint Bliss Recipe:
For those looking to elevate their Festive Chocolate Lava Cakes with Peppermint Bliss Recipe, consider these suggestions that can enhance both flavor and presentation. One option is to incorporate different extracts into your batter; vanilla extract pairs beautifully with chocolate while adding depth without overpowering flavors.
Experimenting with different types of chocolate can also yield exciting variations in taste. Try using white chocolate instead of dark chocolate for a sweeter alternative or combine both types for a unique blend of flavors that delight every palate.
When it comes to garnishing, don’t limit yourself to just whipped cream or peppermint candies. Consider drizzling homemade caramel sauce over each cake or dusting them lightly with powdered sugar for an elegant touch that will impress guests during holiday gatherings.
Serving these lava cakes alongside a scoop of peppermint ice cream offers contrasting temperatures and textures that enhance the overall dessert experience remarkably well. The cold ice cream against warm cake creates an indulgent combination worth trying.
Lastly, if you’re preparing these treats ahead of time, remember that they can be frozen before baking! Simply cover each prepared ramekin tightly in plastic wrap or aluminum foil and store them in the freezer for up to three months; bake directly from frozen by adjusting baking times accordingly.
FAQs:
What is the best way to ensure my lava cakes have a gooey center?
To guarantee that your lava cakes maintain their signature gooey center, precise timing during baking is crucial. Start by following the recommended baking duration closely but keep an eye on them as they approach completion—usually around 12-14 minutes at 425°F (220°C) works well depending on individual ovens’ performance variations.
Why did my lava cakes not rise properly?
If your lava cakes fail to rise adequately, check if you used fresh ingredients like eggs and baking powder since expired items can hinder leavening power significantly leading to dense textures rather than fluffy ones expected in baked goods like this one! Always verify expiration dates before starting any recipe!
How do I store leftover lava cakes?
To store leftover Festive Chocolate Lava Cakes with Peppermint Bliss effectively, allow them to cool completely before sealing each ramekin tightly with plastic wrap or transferring them into an airtight container—refrigerate up to three days! For longer storage solutions freeze them separately following similar cooling instructions first before freezing!
Can I make these lava cakes ahead of time?
Absolutely! Prepare your batter ahead by assembling everything except the final bake—store filled ramekins covered in plastic wrap within refrigerator up until needed; when ready simply pop into preheated oven without needing extra prep work beforehand!
What type of chocolate works best in this recipe?
For optimal flavor enhancement use high-quality dark chocolate containing at least 60% cocoa solids—the richer varieties provide depth while ensuring balanced sweetness throughout dessert experience; however feel free experimenting between dark & white chocolates based upon personal preferences too!
Is it possible to create a dairy-free version of this recipe?
Yes indeed! Substitute regular butter & cream alternatives such as coconut oil/milk respectively while selecting dairy-free chocolates available commercially—these swaps allow those avoiding dairy products enjoy similar deliciousness found within festive creations without compromising taste!
Conclusion:
In summary, crafting delectable Festive Chocolate Lava Cakes with Peppermint Bliss requires attention to detail and awareness of common pitfalls along with valuable tips that can elevate results dramatically! Avoid mistakes such as overmixing batter or neglecting proper greasing techniques while incorporating useful suggestions like exploring different extracts and garnishes enhances both taste & presentation beautifully!
Embrace experimentation within safe boundaries allowing creativity flourish unleashing mouthwatering outcomes guaranteed satisfaction during holiday celebrations shared among loved ones! Remember always serve warm alongside delightful accompaniments leaving lasting impressions long after plates cleared away! Happy baking!
Print
Festive Chocolate Lava Cakes with Peppermint Bliss Recipe
- Total Time: 32 minutes
- Yield: 4 individual cakes 1x
Description
Indulge in these decadent individual chocolate lava cakes infused with cool peppermint, perfect for holiday entertaining. Each warm cake reveals a flowing center of molten chocolate with a hint of refreshing peppermint.
Ingredients
- 6 ounces dark chocolate, chopped
- 1/2 cup unsalted butter
- 3 large eggs
- 1/2 cup granulated sugar
- 1/4 teaspoon peppermint extract
- 1/4 cup all-purpose flour
- 1/4 teaspoon salt
- Powdered sugar and crushed candy canes for garnish
Instructions
- Preheat oven to 425°F. Grease and dust four 6-ounce ramekins with cocoa powder.
- Melt chocolate and butter together in a double boiler until smooth. Let cool slightly.
- Whisk eggs, sugar, and peppermint extract until light. Fold in chocolate mixture, then gently stir in flour and salt.
- Divide batter among ramekins. Bake 12 minutes until edges are set but centers are soft.
- Let rest 1 minute, invert onto plates, dust with powdered sugar and crushed candy canes.
Notes
- Ramekins can be prepared up to 4 hours ahead and refrigerated
- Center should be slightly jiggly when done
- Serve immediately for best lava effect
- Prep Time: 20 minutes
- Cook Time: 12 minutes
Nutrition
- Calories: 485
- Sugar: 35g
- Sodium: 180mg
- Fat: 32g
- Saturated Fat: 19g
- Carbohydrates: 45g
- Fiber: 3g
- Protein: 8g
- Cholesterol: 185mg

